Render AI Help Center
Review these guidelines to get better results while using Render AI.
General Recommendations
- Have a good quality high-contrast image before uploading a linear sketch.
- Be sure to crop the image before updating it to get better results.
- Use as few instructions as possible. Shorter is better.
More about how to use Render AI in our How to Create AI Renders guide.
Image Rendering Methods. Understanding our AI Image Models Capabilities and Limitations
Fast-Definition
Fast-Definition offers a balance between speed and image quality. It generates more defined and detailed images, making it suitable for most creative tasks where clarity and accuracy are important. This method is recommended for users who want reliable, high-accuracy results without a long wait.
Fast-Definition is efficient and cost-effective. In some cases, complex or artistic sketches may require additional refinement to render the best results. A detailed description and instructions are required to achieve good AI render image results.
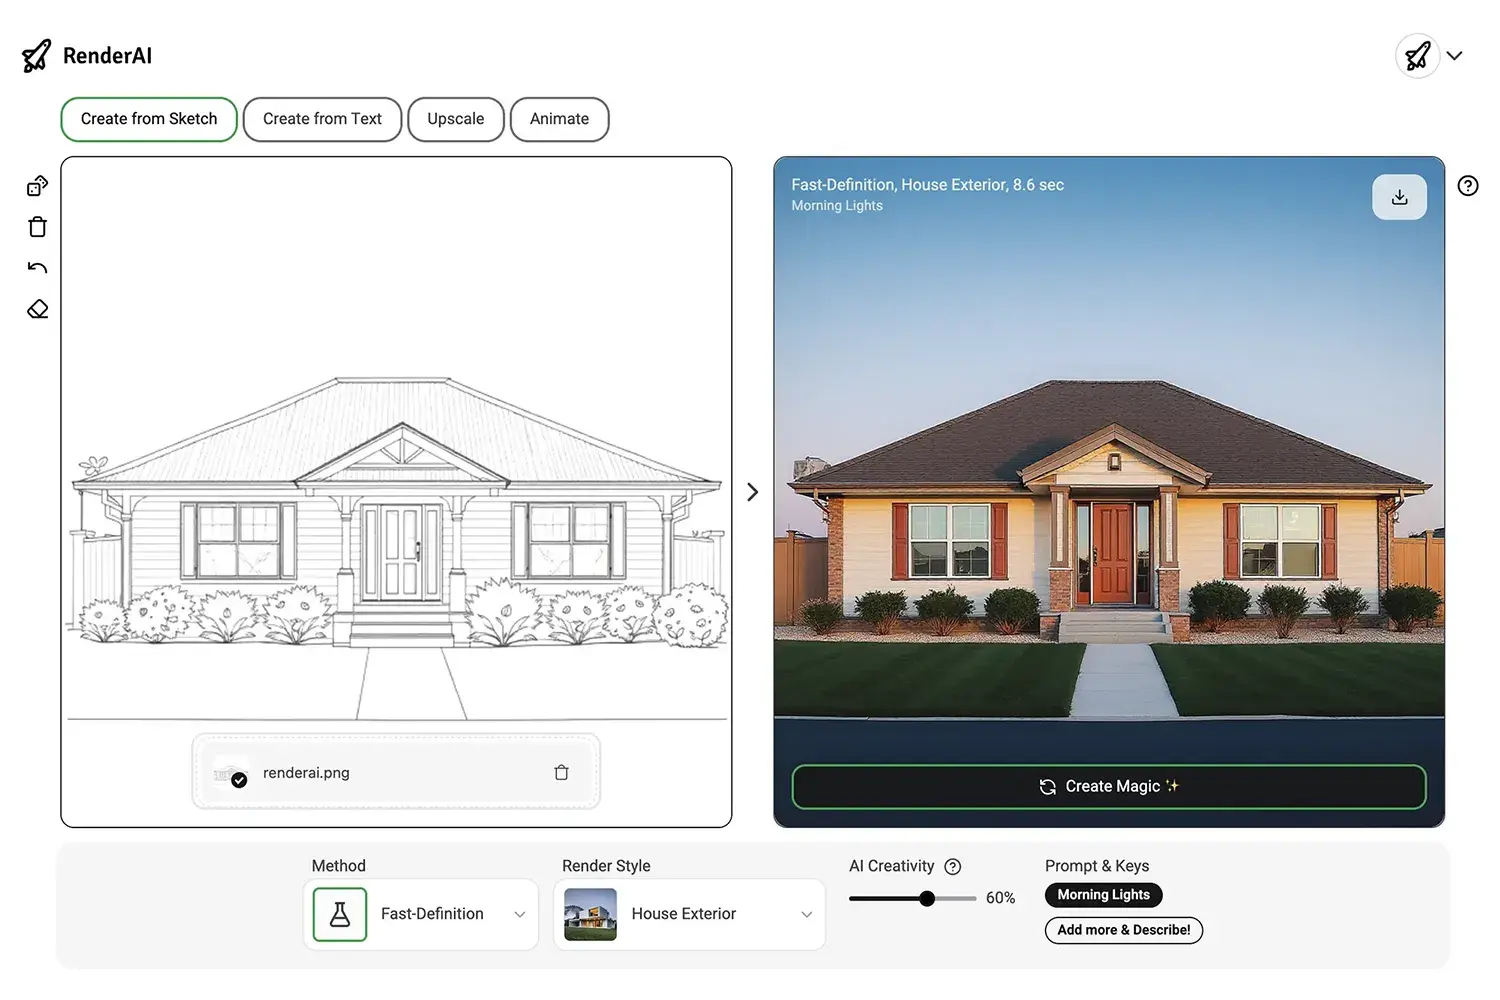
Example of a Fast-Definition AI Render created with RenderAI
Creative-Quality
Creative-Quality is our most advanced model, using cutting-edge AI image technology and designed for the highest possible image fidelity and detail. It is ideal for final renders, presentations, or complex scenarios where quality is the top priority. This method uses complex AI techniques to undestand the source image and produce a new, stunning, high-resolution output.
Creative-Quality takes longer to generate results and uses more credits. In some cases, the output may not match the input sketch exactly, as the model prioritizes source image interpretation and realism. Use this option when you want the best possible visual outcome and can allow extra time for processing.
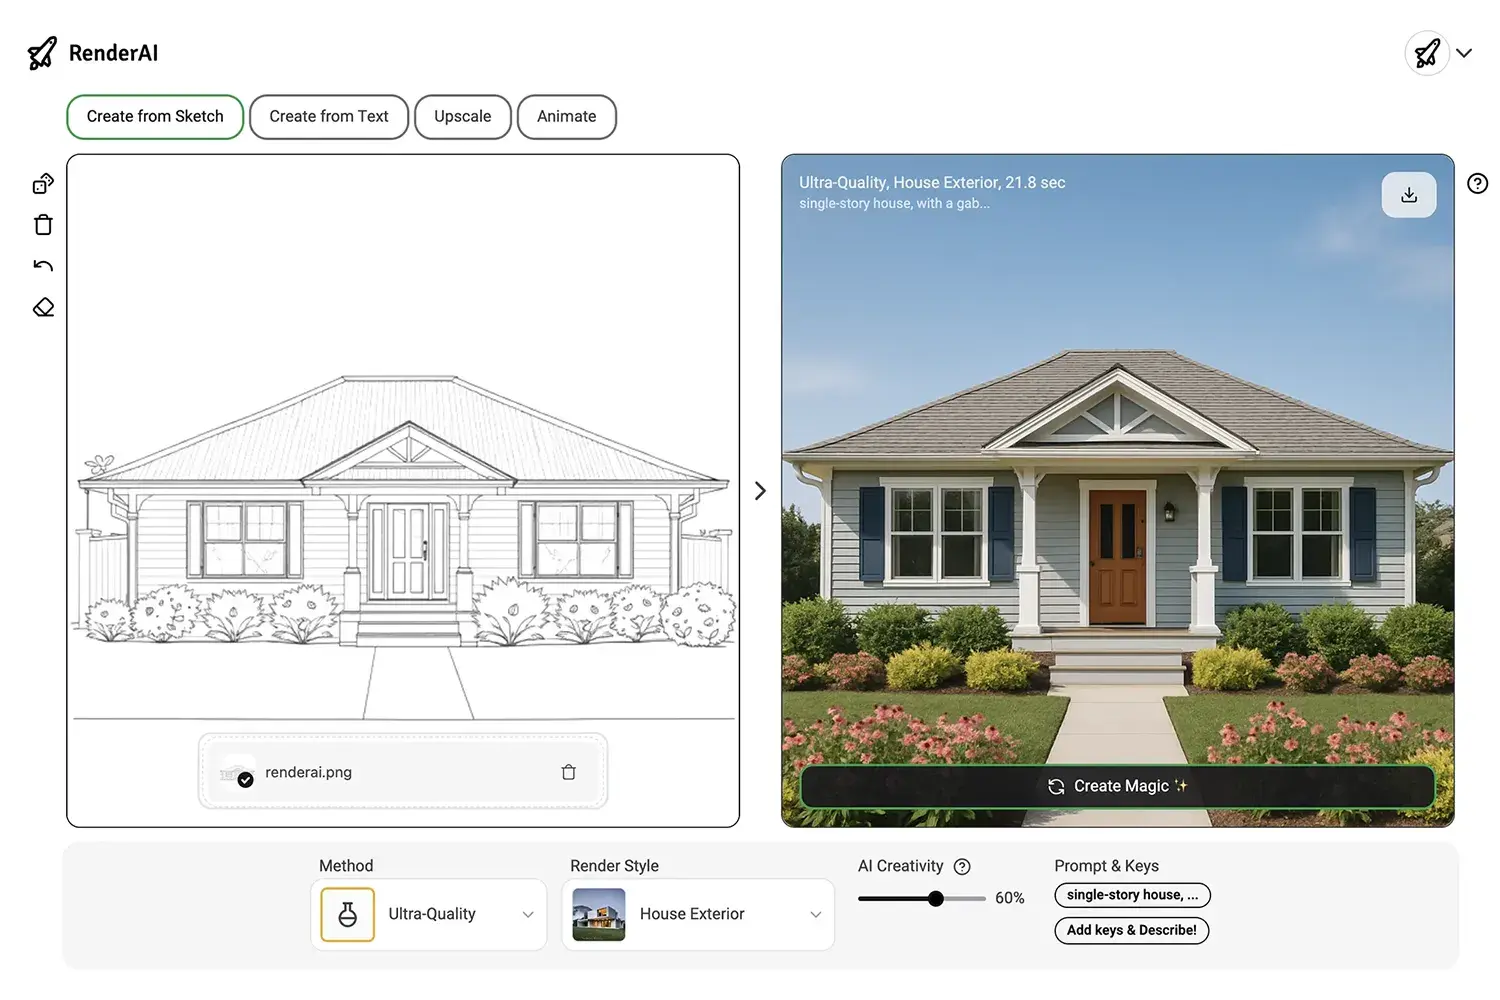
Example of a Creative-Quality AI Render created with RenderAI
Linear Sketch to Image AI Rendering
Draw or upload a linear high-contrast sketch or image.In the following examples, we use a linear sketch or a rendered image. The app will automatically extract lines and edges from the image, and use that as input for the Artificial Intelligence model to generate a completely new image.
Sketch to Image example:

"Minimalist kitchen", by Francisco
Image to Sketch to Image example:

"Modern bathroom", by Francisco
Uploading Custom Images
To upload custom images, first clear the sketch canvas and Choose file. Once the upload is finished, add your keys, and click on Create Magic. Render AI will analyze the image to extract lines, and then will create a new image based on the original using AI.
Custom Sketch Example:

By Maxwell
Unlocking upload custom image

- Uploading a custom image is a Starter or Pro Plan Feature. Get any pack to unlock.
- If you got a pack but you still see it locked, check for our confirmation by email or contact us.
- Be sure to refresh the app to apply the update once you get the confirmation.
- If there is an error while uploading, check the size or format of the image.
Connect Render AI to Rhino
- Install in Rhino, or type
PackageManagerin Rhino, search for "RenderAI" and install it. Restart Rhino. If Package Manager doesn't work, download it from food4Rhino. - Open a model and type
RenderAIto open the panel.RenderAIWindowopens it as a separate window. - Click Connect Account. In Settings, click Sign in and log in to RenderAI. No account yet? You can create one on the same page. Check that the code matches the one in Rhino and click Connect.
- Click Capture view, then Create. The render appears in the panel and in your history.
- If sign in doesn't work on your computer, contact us for an API key, then click Use an API key instead in Settings. If something else fails, type
RenderAIDiagnosticsin Rhino and send the result through the contact page.
Connect Render AI to SketchUp
- Download the extension (v1.0.0, SketchUp 2024 or newer on Mac and Windows). In SketchUp, open Extensions > Extension Manager, click Install Extension and pick the
.rbzfile. - Open Extensions > RenderAI > Open RenderAI Panel, or click the RenderAI toolbar button.
- Click Sign in. Your browser opens on RenderAI. Check that the code matches the one in SketchUp and click Connect. No account yet? You can create one on the same page.
- The panel captures your view, or pick a scene in Capture from. Choose a style and click Create. The render appears in the panel and in your history.
- If something fails, contact us with your SketchUp version and system. More details on the SketchUp extension page.
Ready to Transform Your Sketches?
Join thousands of creators using RenderAI to bring their ideas to life in seconds.